
Software Highlights
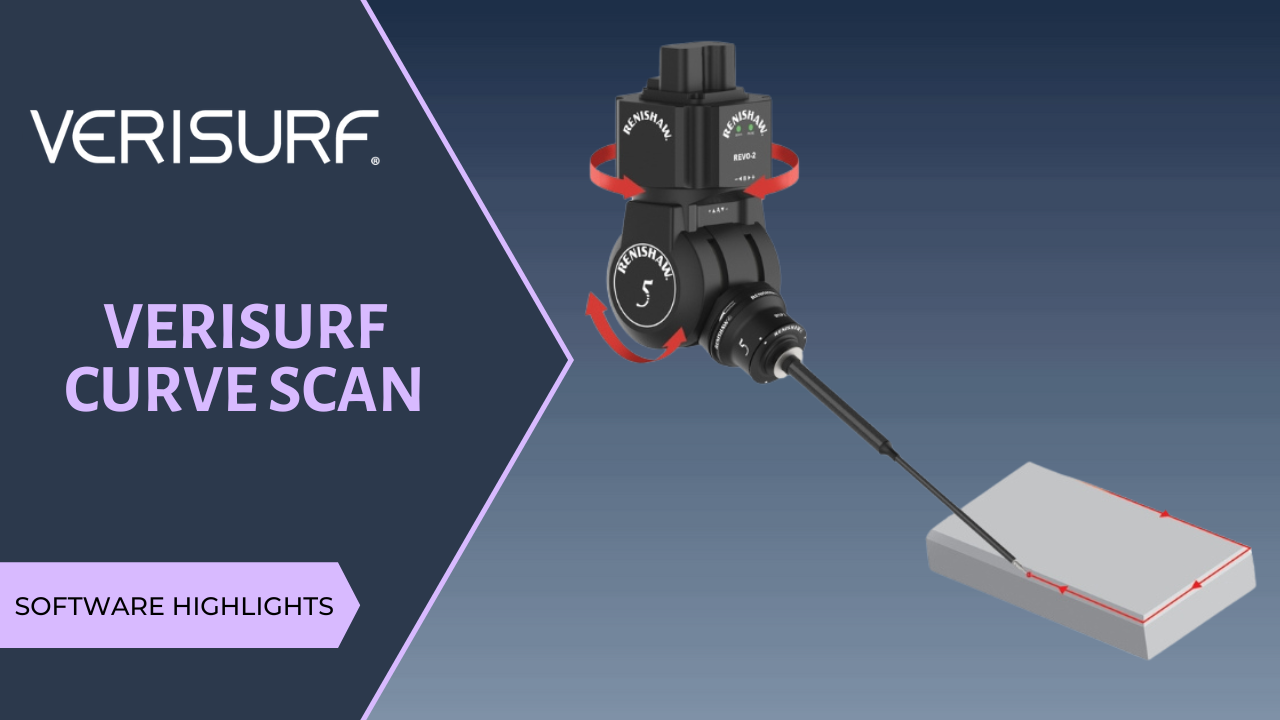
Verisurf Curve Scan
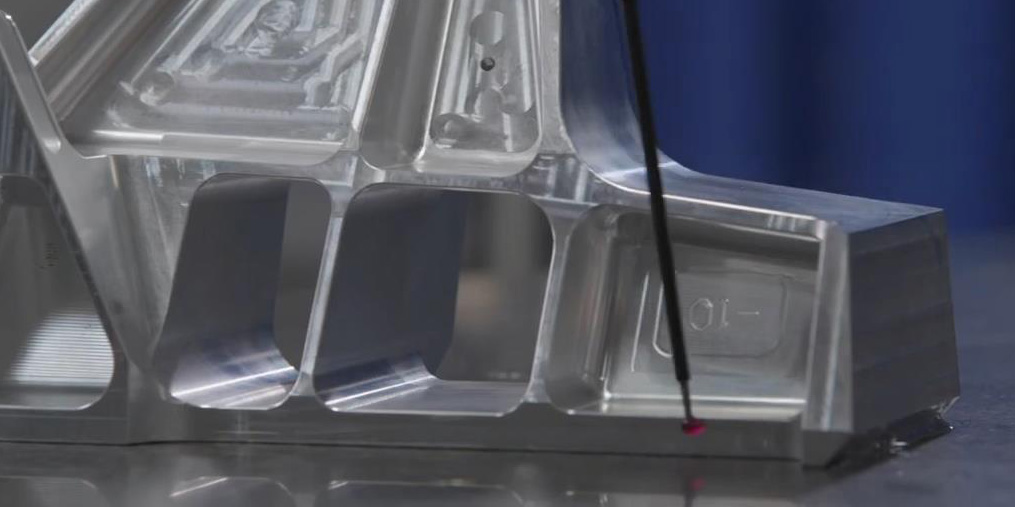
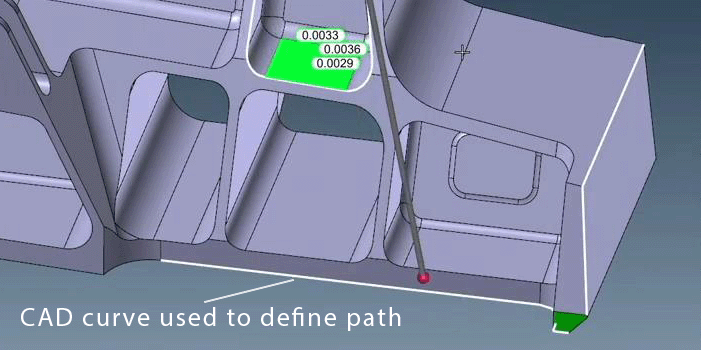
CURVE SCAN is a Verisurf-exclusive path technique for 5-axis CMM tactile scanning of edge-type surfaces. 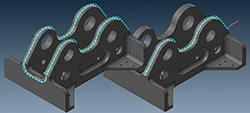 To establish the shape of the path, the technique utilizes a CAD curve. Such a curve will naturally exist at the junction of the edge and adjoining surface, and Verisurf’s true CAD foundation takes advantage of it. The Verisurf Curve Scan optimizes the path by controlling the 5-axis head’s behavior as it follows the route defined by the curve. The result helps achieve high measurement speed and accuracy by utilizing the head’s tilt and rotation for most of the movement along the path, while maintaining a single direction and speed of the CMM’s main XYZ structure. This minimizes the inherent error that movement of the higher mass bridge might induce.
Made Easy with Verisurf CAD
Verisurf’s CAD foundation enables us to better recognize surfaces and create complex CMM scanning paths to gain superior performance from 5-Axis CMM scanning technology.
Making CURVE SCAN easy to program is Verisurf’s Curve to Surface Points tool:
Verisurf Curve to Surface Points Path Creation Tool
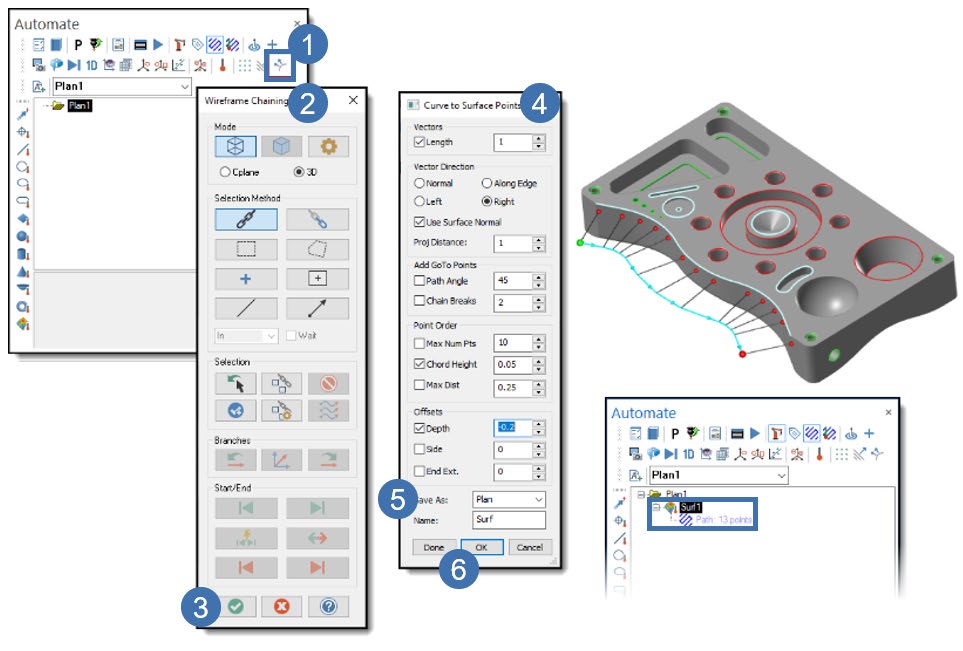
Verisurf’s Curve to Surface Points tool in the Verisurf AUTOMATE CMM programming module is a super-simple and effective way to program a path using wireframe lines, arcs, and splines. Furthermore, with the software’s true CAD foundation, the wireframe CHAIN selection is also a big productivity enhancer. The Curve to Surface Points feature allows users to create a path from curves with a quick feature pick or chain selection.
Using Curve to Surface Points
The following process must be used within Automate to set up and define a Curve to Surface Points measurement process.
- Select Curve to Surface Points from the Automate toolbar to add the Curve to Surface Point object to the Plan. If no Plan exists, Verisurf automatically creates Plan1 to hold Data created by this function.
- The Chaining dialog opens, allowing you to specify the Entity Selection method.
- Choose the Curve(s) to which you want to assign a path and select the Green Check to complete.
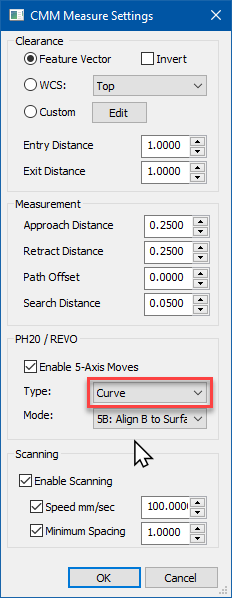
- The Curve to Surface Points dialog appears, allowing you to control
• Vector Length
• Vector Direction
• Use Surface Normal
• Add GoTo Points
• Point Order
• Offset
• In the Save As control, verify that the Plan is selected. - Select Done for each Surface Point object required; the dialog box can remain open for multiple selections. Choose OK to close the function and add the points to the Plan.
For more information about Curve to Surface Points functions, see the Verisurf Analysis Reference Guide in the Verisurf Documents folder on your Computer Desktop.