3D Scan to CAD Reverse Engineering
Need a CAD model for documentation, 3D printing or manufacturing and have no drawings?
Best practices and workflows to achieve great reverse engineering results from 3D scanning and complimentary techniques.
Introduction
In this article, we present important considerations in support of reverse engineering with 3D scanning, often referred to as “3D scan to CAD.” Elevating these aspects should help plan for and execute the work efficiently, avoid costly mistakes, and clarify what’s important for success. Here, we focus on physical parts and the need to develop a 3D CAD (computer-aided design) model, which has become standard practice for defining geometry, size, and shape. CAD is also the foundation for most manufacturing, subcontracting, and quality control activities in most industries.
What is reverse engineering?
The term “reverse engineering” comes from the need to reverse the typical steps of designing and manufacturing products, starting with an already manufactured item and using it to derive the design. Reverse engineering (RE) of physical parts involves creating a 3D model from a representative sample piece that can then be used to manufacture more.
Why do we need reverse engineering?
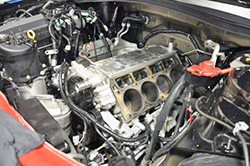
Chevy block waiting for ported cylinder heads to be installed and tested. (courtesy Livernois Motorsports & Engineering)
The primary need for reverse engineering stems from the need for a 3D CAD model when none exists or is not available to the manufacturer that needs it. The 3D CAD model is necessary because they have become the default industry standard of product definition for computer-aided manufacturing and product lifecyle baseline. Reverse engineering an item eliminates the need to start from scratch to design a part, helping to prevent “re-inventing the wheel.” With RE, we use a sample item for our baseline for design, manufacture, measurement, testing, and evaluation. We can typically count on the finished product to be consistent with our sample, making it the best solution to meet stated goals. Read full article: Metrology Drives Performance at Livernois Motorsports & Engineering.
PART 1 – Foundations, Technologies, & Preparation
Why is 3D scanning often preferred for reverse engineering, and how does it compare to contact probing methods?
There are pros for non-contact scanning and there are pros for tactile probing methods, but for many parts scanning works better or is essential. Following is a look at the benefits of 3D scan to CAD, and what might be better suited to probing. A hybrid of both techniques may be the best approach at times.
Scanning VS Probing
Pros for scanning:
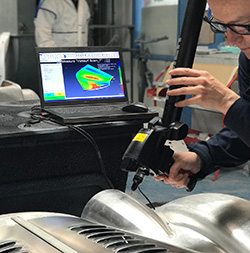
3D scanning makes it easy to obtain 100 percent coverage including the fine detail, critical for formed sheet metal panels.
- While simple geometric features like planes, holes, and flats can be measured with hand tools such as calipers, micrometers, and height gages, shapes that are non-geometric, complex contours (for example, an aircraft airfoil or an automotive body panel) cannot easily be reverse-engineered with gages.
- Soft, non-rigid parts are not suitable for contact probing since they deflect when touched by contact probes or gages. Also, some are delicate, and therefore, it is desirable to use non-contact methods. Super-complex, organic shapes (such as a person or animal intended to be manufactured as a figurine) are almost impossible to reverse engineer using contact probes or gages.
- Scanning gathers a lot of data quickly, so it can be a major productivity tool. While contact probing with CMM-type devices is often used for reverse engineering, non-contact scanning can make it faster and easier.
- 3D scans can cover the entire part, including fillet radii and fine details that are desirable to be captured.
- There is no need for probe compensation. Contact probes use a ball-type tip or “stylus,” the centerpoint which must be captured and offset to the theoretical contact point by the measuring device and 3D scanning software.
Pros for probing:
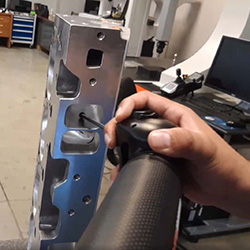
For non-line-of-sight inner features beyond the reach of non-contact scanners, tactile scanning with a contact probe works well.
- Probing and gages can be more accurate than scanning. Most scanning methods are said to contain around 0.002 in. (0.05 mm) accuracy error on average. Contact probing and gages can produce more accurate results.
- Non-contact scanning is line-of-sight measuring and often cannot obtain good data inside holes or obscured features. Most of the time these types of features can be digitized with contact probes.
- Scanning provides a lot of point cloud or mesh data. Large data files can be burdensome to handle, often challenging for computer performance and storage. The large datasets can include an over-abundance of data that is more intrusive than beneficial. It usually takes time to clean the data of erroneous “overspray” or “noise.” It can take longer to turn a dense point cloud into a feature or surface than probing or hand gaging it.
- Scanning systems typically are a much larger investment than probing.
- Scanning can have many of issues with surface reflectivity, color, or finish. It may take a while to get a good scan, or may not be possible at all. Often times parts must be sprayed with some type of coating to allow scanning.
Differentiating Between DESIGN INTENT and AS-BUILT Use Cases
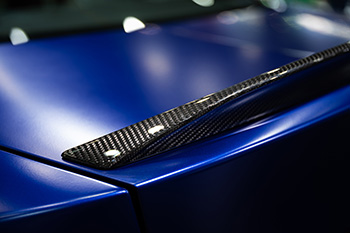
Aftermarket automotive add-ons create a need to reverse engineer the design intent model of the attachment and surrounding geometry.
Is the purpose of a reverse engineering project because there is no CAD model for the part? Maybe it’s a historic design that was not designed in CAD, so there never was a model. Or it could be a part designed by an OEM or other manufacturer who isn’t open to providing the model. Another common need typical with aviation MRO (maintenance repair and overhaul) providers is in circumstances where older aircraft experience an AOG condition (aircraft on the ground – out of service). At times, the aircraft has a broken part, and the repair station cannot find a replacement. Reverse engineering of an old or failed part may be needed for the solution. Another common occurrence is aging military aircraft that were designed and manufactured decades ago. Contractors often embark on a “service life extension program” or SLEP to keep them flying longer than originally intended. In the automotive aftermarket, parts manufacturers design and build much sought-after options and add-ons, or restorations for classic cars, that consumers are anxious to buy. Since car manufacturers do not offer their intellectual property for the aftermarket to use, mounting and clearance geometry must be reverse-engineered. When it comes to industrial machinery, often their components are no longer in production by the OEM but are needed to repair and extend the life of the equipment. In all of these scenarios, the purpose of RE is rooted in the need to capture the product’s “design intent.”
In contrast, reverse engineering is sometimes called upon to capture the “as-built” condition of a part. Examples include castings or forgings that are purposefully designed to their near-net shape with “plus material” built into the design. Subsequent to initial forming operations, these parts then undergo machining to take them to the final design condition. Similarly, it can be beneficial to utilize an as-built model for stamped sheet metal, plastic, or composite molded parts. Sheet metal springback and molded part warpage create the need to know what the tooling produces so engineers can make accommodations. Another application is when large parts and tools are made with plus material intentional to the design, with the plan to machine to the net shape after forming. Manufacturers reverse engineer these large surfaces so they can program their CNC machines to the as-formed surfaces to save time and money.
DESIGN INTENT Modeling Explained
Design intent modeling is what most think of when they think of RE. It typically requires intense attention to detail and specificity, both during the data acquisition as well as modeling tasks. In this process, data is gathered, measured features are scrutinized to understand each one’s purpose, and then dimensions, spacing, angles, and patterns are “normalized” to adjust for design intent. For example, if a hole measures 0.2497 inches in diameter, one might assume the original blueprint called for a ¼ inch hole. If it’s part of a five-hole bolt pattern that appears to be concentric around a single center point, one can assume that each hole should be placed at equal angles around the pattern. If the hole is almost exactly one inch from the edge of a flat surface, it’s safe to assume that was the intent. Therefore, the engineer would place the hole center exactly one inch from the edge instead of the imperfect distance it measured.
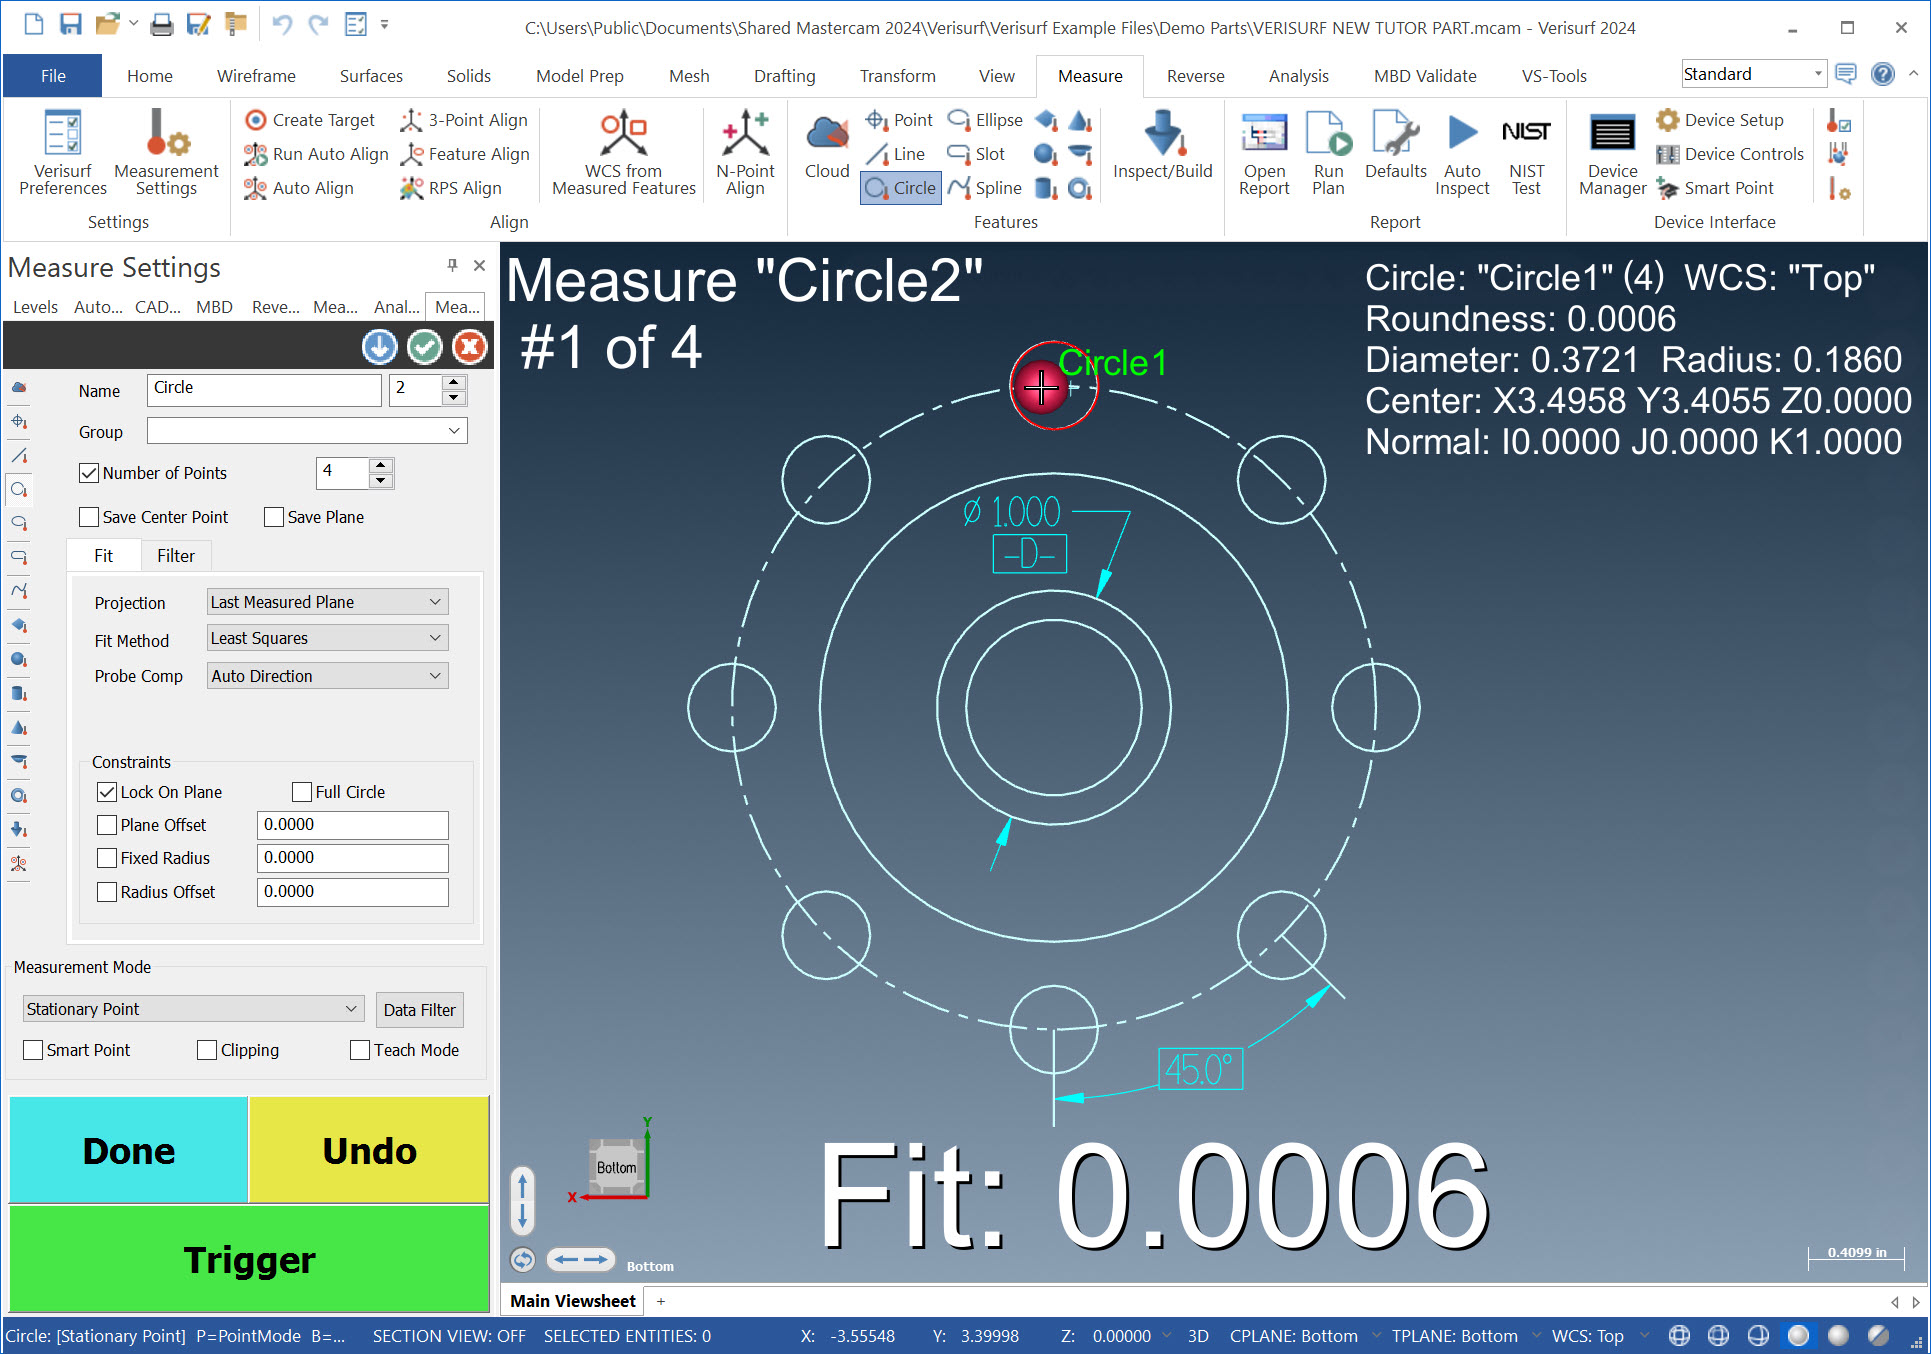
For this bolt pattern, the first hole is measured 0.3721″. However, instead of saving this value to CAD, the engineer rounds the value to the “DESIGN INTENT” diameter 0.3750″, also rounding the distance to bolt pattern center, puts it at precisely 12 o’clock, then saving it to CAD. Next it is copied 7 times at exact 45 degree increments around the center boss using CAD.
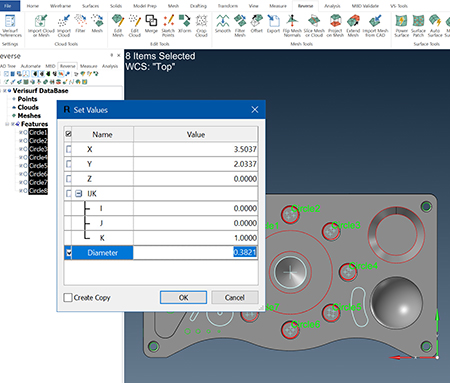
In Verisurf software users can multi-edit measured features to round values for design intent, or do it with the built-in CAD.
Some engineers choose to do more of the work in their CAD software in which they have great skill and comfort. Some do most or all of the CAD creation right within their metrology software. Not all 3D scanning software has full CAD capabilities built in, but software such as Verisurf is built on a CAD foundation and, therefore, has everything you need within the metrology application. Having all the tools in one software can be helpful, as it is an iterative process that often requires bouncing back and forth between the original acquired data, the part itself, and the emerging CAD model. When working to capture the design intent, one must make assumptions that have to be tested and sometimes modified a few times before settling on the best option. The ability of one person with the ability to do everything in one place can make it easier and more accurate.
AS-BUILT Modeling
Capturing the as-built condition is much more straightforward. The task is to create a 3D model of the part exactly as it has been produced. Often it is just a particular feature or surface that’s of interest, and not the whole part or assembly. The model should reflect the part that results from the production tooling, equipment, methods, conditions, and operations that made it. Production processes that are notorious for variability are good candidates for modeling the as-built condition.
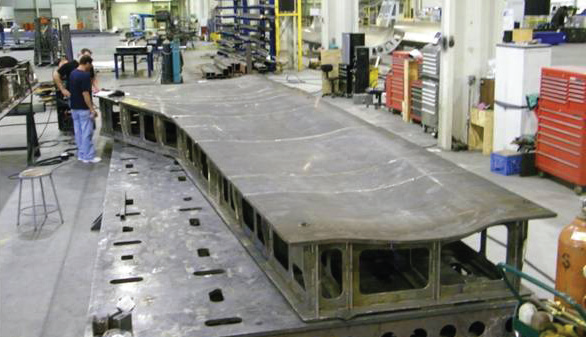
“Using Verisurf software we are able to save days, even weeks of machining time on large-scale bond tools,” said AIT’s Jamie Kempen. Typically, creating a face sheet that starts out at 1-inch thickness and is taken down to .5-inch will be reduced by less than “.100 with each pass. The machine starts with the high points and works down. In doing this, AIT used to “cut air” for days until the machine finally got down to the uniform layers. Now they use Verisurf to 3D laser scan the as-built tool surface and create a machining model that allows them to cut material 100% of the time.
This is a standard procedure for engineering and manufacturing to make adjustments to the production tooling and processes. On the other hand, they may find it works best to accept the product as-is if it meets form, fit, and function requirements. In this case, they need the as-built model so they can then establish it as the design authority model, replacing the theoretical model with the as-built version for full production. Downstream processes, suppliers, and customers will need it for their activities.An important asset to any as-built project is a deviation color map of the as-built versus the CAD design surfaces. Manufacturing can use it to paint a clear picture of what their process is yielding, and use it to direct adjustments as required. A common application is for final CNC machining to the engineered finished condition. The CNC department can use the as-formed surface models to program cutter paths to the true surfaces as they come off of the preceding sequence. Doing so, programming the CNC machines to the as-built surfaces avoids “cutting air,” and saves a lot of expensive machine time. Read full article: Where High Precision Meets Critical Thinking at Advanced Integration Technology, LP (AIT).
Software – its importance in 3D scanning and reverse engineering
The metrology software plays a key role in the complete project including the actual engineering part of reverse engineering. Some of the key functions are:
- Operation and management of the scanner through the OEM’s and 3D scanning software’s handshake interface, which streams the data and controls key calibration and utility features of the device. Some scanners are run offline, separate from the metrology and CAD software. In this case, data is gathered and then exchanged by file transfer for further processing.
- Alignment of the scanner and/or measurement device to the workpiece and the 3D reference system of the metrology software. Alignment can be accomplished before or after scanning. Typically, it works best to align to features on the part before scanning.
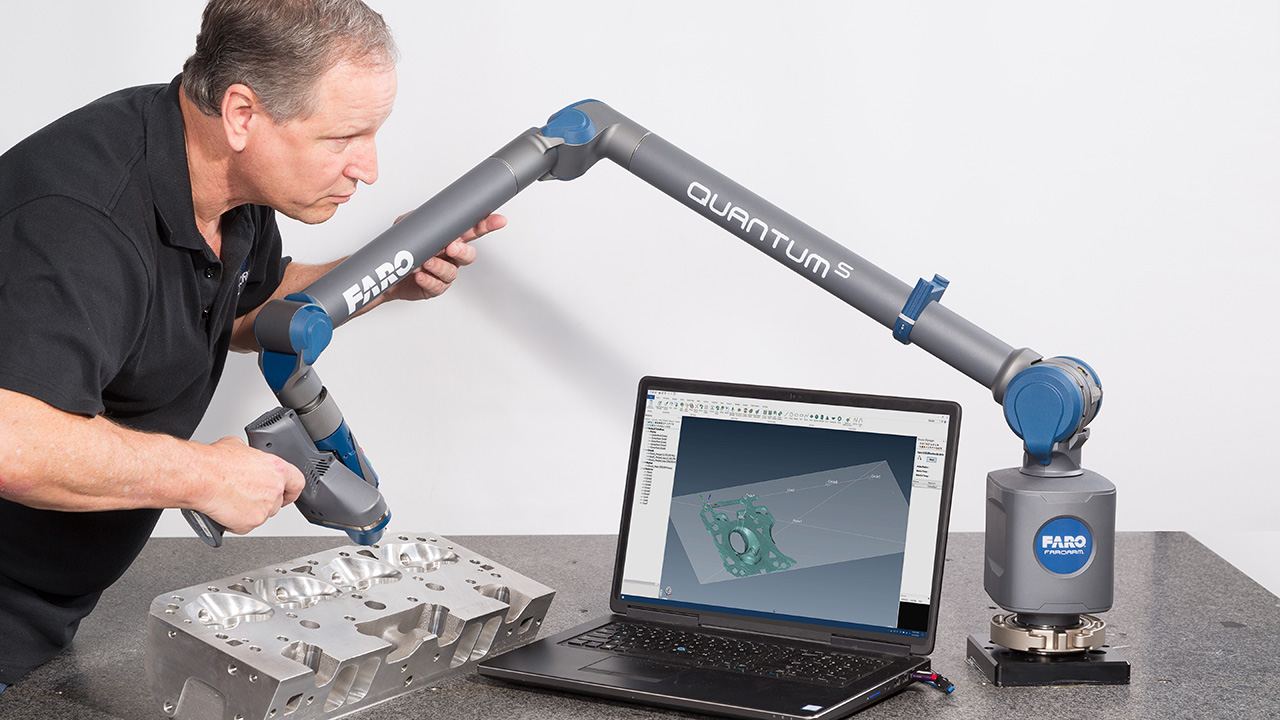
Some of the key functions of the metrology software are: operation and management of the scanner, alignment of the scanner to the workpiece and the 3D reference system, visualizing the scan and whether voids are occurring, and device relocation as required (a.k.a. “leapfrogging”).
- Visualizing the scan is a very important aspect of the job. The operator needs to have a clear view of how the data is coming in, whether they are getting a good scan, and whether voids are occurring.
- Device relocation as required (also known as “leapfrogging”).
- Merging and aligning scans as required, either point clouds or meshes.
- Clean up, filtering, and smoothing of the data, rendering point clouds to a mesh, and refining the data to make it more useable.
- Feature fitting for primitive features such as planes, holes/cylinders, spheres, slots, etc., is best done in the metrology software. It has many fit methods (such as NIST2 math verified) and filters to achieve the correct size and position. If scanning and measuring are being done by a probing device, necessary probe compensation is done during measuring.
Meshing – a robust suite of mesh tools are essential
Polygonal meshes are almost always used in 3D scanning reverse engineering projects. The dense point cloud that is spread across the scanned surfaces like a coat of paint by the scanners, can be converted into a “watertight” mesh that represents the entire part geometry. Numerous surfacing tools within reverse engineering software can convert meshes or mesh segments into primitive features such as cylinders, planes, spheres, etc., and also lofted NURBS (non-uniform, rational b-spline) surfaces that define organic, free-flowing shapes. However, it’s important to note that meshing is not the only way to get from scanned data to CAD. Slicing and feature-fitting from point clouds are also possible without the use of meshes. Nevertheless, meshes are frequently used in some stages of the RE process.
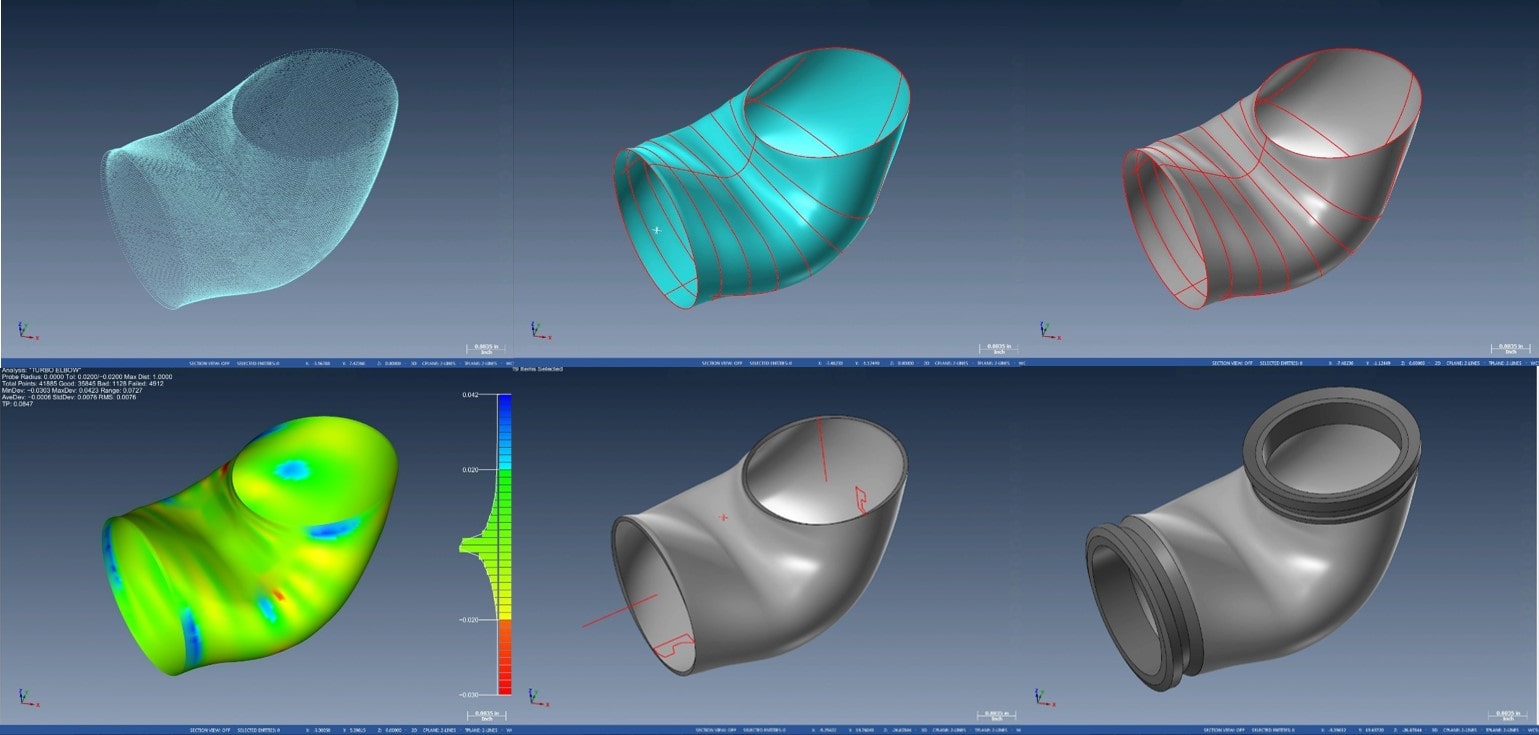
Polygonal meshes are almost always used in 3D scanning reverse engineering projects. The dense point cloud that is spread across the scanned surfaces like a coat of paint by the scanners, can be converted into a “watertight” mesh that represents the entire part geometry.
While 3D polygonal meshes (STL-type “surfaces”) do not have to be used for all reverse engineering, it has become quite common. STL formats are used in 3D printing and other additive manufacturing, and they are the typical CAD type used to build, fit, combine, and consolidate geometry. While STL is not true CAD surfaces or solids itself, it can be used to create NURBS surfaces or solids geometry. Surfaces and solids can be converted to fully parametric 3D models suitable for engineering design and best for modifications that may come about.
Some engineers choose to do more of the work in their CAD software in which they have great skill and comfort. Some do most or all of the CAD creation right within their metrology software. Not all 3D scanning software has full CAD capabilities built in, but software such as Verisurf is built on a CAD foundation and, therefore, has everything you need within the metrology application. Having all the tools in one software can be helpful, as it is an iterative process that often requires bouncing back and forth between the original acquired data, the part itself, and the emerging CAD model. When working to capture the design intent, one must make assumptions that have to be tested and sometimes modified a few times before settling on the best option. The ability of one person with the ability to do everything in one place can make it easier and more accurate.
Making a plan – essential for low-stress success
Begin with the end in mind.1
The end product and how it will be used can influence decisions you make along the way. The requirements for accuracy are amongst the highest importance of all aspects of the job. A product where appearance is the top priority will have a different approach than one where accuracy is the driving factor. When it comes to accuracy, sheet metal or plastic formed parts like car fenders or aircraft fairings, may have a tolerance of +/- 0.030” (0.8 mm), but machined gears or intricate mating parts might need something like 0.0002” (0.005 mm). Furthermore, the form, fit, and function of the part can lead you to specify tighter tolerances for mounting features or other functional shapes. You might even need to consider GD&T constraints as you evaluate features and the role they play in the part design. For example, rails that are part of a sliding mechanism could present a necessity where parallelism is essential and needs to be called out in your finished engineering model.
Consider CAD data requirements – CAD model file type, level of completion, 2D drawings
Consider the required data format(s) of the finished model. For instance, will a SolidWorks file format solid model, paper drawings, or both be needed, or something else? This may be influenced by how the part is to be manufactured. If some features are rough, as-cast, non-mating “runoff” areas, they won’t require the same precision and detail as sealing or even mating features. Those features will require legitimate engineering principles to be applied but will not require the same level of accuracy that other details will.
Ambient conditions – making accommodations
Understand the conditions in which the data will be taken. Is it indoors, free-state, or in situ on an assembly, stable or moving, or will it be subject to vibration or other environmental conditions for which you need to accommodate? There are solutions for all of these conditions. For example, with parts that might incur movement, there are dynamic reference systems either integral to the metrology or as an external technology. For temperature variations such as outdoor work, CTE (coefficient of thermal expansion) can be accommodated by the metrology software or through manual scaling. There is a lot that could be covered on the topic of ambient conditions, enough that a more comprehensive article would be best. Check out Verisurf’s CTE Coefficient of Thermal Expansion mobile app.
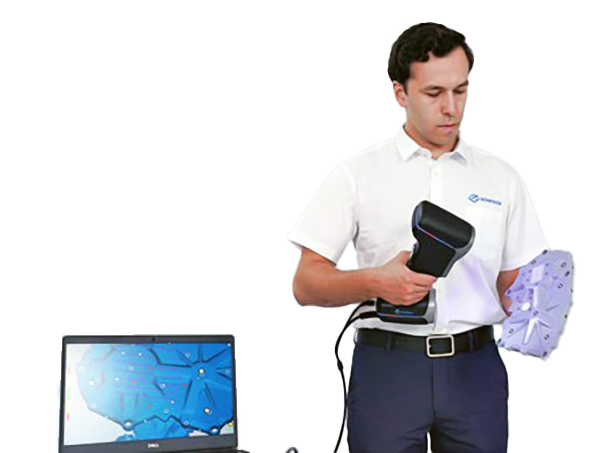
Camera based scanners that utilize photo-reflective stickers allow part movement while scanning, effectively a dynamic reference frame (DRF).
Moving the part – Device relocation, leapfrogging, or turntables for access to the entire workpiece
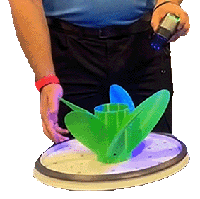
Rotary table dynamically indexed to reference system
An important aspect of planning the job is the need for relocating or re-fixturing the part to gain access to areas that can’t be reached from one perspective. This can be achieved through “leapfrogging,” or relocation fixtures. Drift nests are a hockey-puck-like tool that is often used especially in large volume metrology. Photogrammetry targets are often a reflective, round sticker or a sphere with mounting base. There are magnetic targets, or one can use simple round washers and a hot glue gun to get the job done. Some jobs using camera-based scanners can use the photogrammetry dots providing a dynamic reference system that allows free movement of the part even while scanning. Another solution is a rotary table that can have its own encoder, which enables a dynamic reference system and access to all sides of the part being scanned, and precluding the need to re-fixture the part or scanner. Learn more here: Portable CMM Arm Accessories.
Choosing the right type of scanning device
When evaluating choices for the appropriate scanning device(s) there are a number of considerations which can lead you to select the best scanning system for your needs. And unfortunately, there may be a necessity to compromise and decide which option is the best choice albeit not perfect in all aspects of the job.
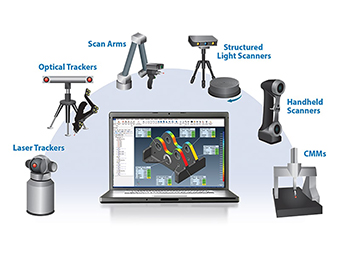 Accuracy requirements
- Size of the workpiece
- Access to features, such as those obscured from line-of-sight
- Surface finish – rough or smooth, light or dark color, shiny or matte finish
- Surface softness or vulnerability
- Other factors
Again, devices will be chosen based on the best but not perfect choice, or availability may be the deciding factor. The options vary widely in terms of the cost of equipment. For non-contact scanners versus tactile CMM-type devices, it should be noted that for soft parts and for those with highly undulated or rough surfaces, non-contact is the only way to go. For tight tolerances, contact CMM devices are best.
Articulating Arm & Scanner Combo
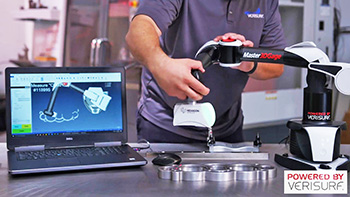 This solution has the advantage of non-contact, high volume data acquisition of the scanner and also the ability to probe holes into the part beyond reasonable access of the scanner. The probe typically is more accurate than the scanner and therefore may be chosen for features that require higher accuracy such as datum features, with holes and slots being of greatest relevance.
Structured Light Scanner
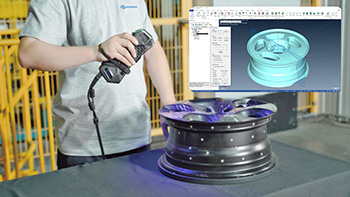 These devices take a lot of data very quickly and can be focused for accuracy or field of view, whichever is the more critical. They acquire cleaner point clouds than articulated arm scanners and require less cleanup, averaging, or smoothing, especially in areas of overlapping scans. Scanners attached to arms have the disadvantage of error induced by the articulating joint encoders, which makes overlapping scans a bit noisy. These devices may take longer to finish the job because it may be necessary to use another means to get data in holes or features that are not accessible to line of sight.
Contact Probing CMM (Coordinate Measuring Machine)
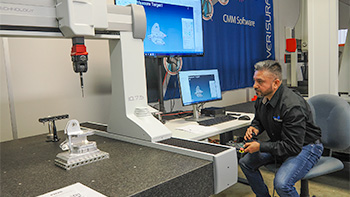 CMM-type devices will do an acceptable job for reverse engineering certain types of workpieces and certain types of shapes. In fact, there are times when contact CMM devices are better than high-volume scanners. When high accuracy is important, it may be the only solution since they are typically around 0.0002” (0.005 mm) in accuracy and non-contact scanners are around 0.002” (0.05 mm). Please note that these values are only ballpark and can vary widely, but these numbers give you an idea of what you are up against. Something that is important to note, and it is not a popularly understood reality, is that touch probe or hard probe CMM devices can not only do the reverse engineering work, but they can often do it as well or better than non-contact scanners.
Organizing the Data – for Clarity and Efficiency
 The complexity of the workpiece governs the structuring of the model. But in general it helps to organize the data with the use of CAD levels (a.k.a. layers), different colors, and naming items as you can. Use names in the CAD Levels Manager and/or CAD tree so that you can recognize and do things with the groupings. It will be helpful to turn things on and off, or to move, scale, or make other changes to groups all at once and avoid the need to handle several entities one at a time. Use terms that make sense to you but also likely to make sense to others, in case you will be handing off the rough data or work-in-progress model to someone else to finish.
Determine a Strategy for the Part Coordinate/Reference System and Primary Datums 
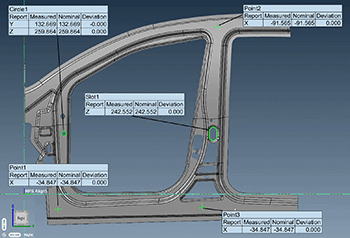
Reference system defined per auto industry standardized methodology (RPS Alignment)
The CAD reference system sets the zero planes of the coordinate system’s X, Y, and Z axes. (See illustration below of an automobile reference system.) The philosophy for the coordinate system is typically based on the form, fit, and function of the part, and usually is dependent on how it attaches to the next assembly if there is one. If the part has a flat that represents the main parting surface for mating with the next assembly, it is probably a good “Datum A” from which to orient the origin at the Z plane (the plane that lies on the X & Y axes and is the location of the origin/zero of the Z axis). Metrology relies on the 3-2-1 principle of alignment and datum structure for controlling parts and assemblies within a reference system. Therefore, the second element to define for the reference system is typically the X axis, and if available it is customary to use a straight line parallel to X or two features with centerpoints that can be used for the line orienting X. The final element required to control the “six degrees of freedom” is Datum C, which will serve to set the part’s translation along or parallel to the X axis, to set the origin along the final axis, typically the Y axis. This can be a point along an edge or line, or the center of a hole or a boss. Discover details in our comprehensive article on RPS Alignment.
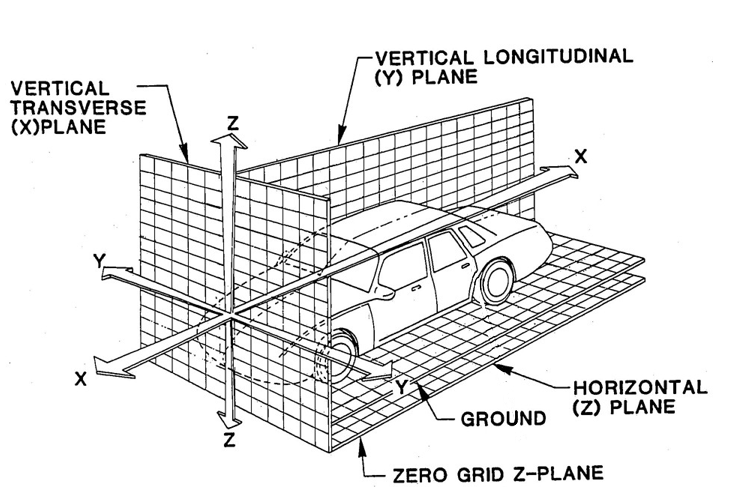 Why go to all this trouble? You need a zero point and directions from which to measure. A good example is hooking a tape measure over the end of a piece of lumber to measure it. That end where you hook the tape measure is the datum, albeit you are just measuring in “1D” and not 3D.
Set Realignment Targets (a.k.a. Leapfrog or Drift Points) or Camera Reference Targets
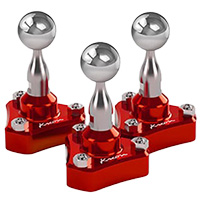
Magnetic spheres are an example of device relocation “leapfrog” targets.
For larger parts it may be the case that the entire part cannot be scanned from a single device location. This is accommodated by affixing relocation, leapfrog, or drift targets on or around the workpiece that can be reached from to successive locations. This requires 3 or more points (the more the better for accuracy), and is typically something like a hole, a sphere, or other reliable feature that can be measured and will not move from its original location. For camera-based scanners, round reflective targets are to be placed per the instructions of the scanner manufacturer. These are usually ¼ inch or so round reflective targets which are imaged accurately by the scanner, which locates off of the targets centerpoint. With the targets in place, the scanner can be moved around the part dynamically referencing the points in real time so it knows where it is, and puts the points in the correct place in the cloud as it is being captured. These targets can also be used to “stitch” multiple scans together into an accurate, single pointcloud. Explore leapfrog targets and more in this article on Portable CMM Arm Accessories.
Feature Fitting within the 3D Scanning Software
Typically the software used to run the measuring device and scan the part has NIST2-tested geometric feature fitting (planes, cylinders, cones, spheres, etc.) that simplifies feature creation and ensures accuracy. It should also allow filtering, smoothing, and refinement, plus “normalizing,” or rounding and converting measurements to design-intent dimensions when desired. Once features are created in the metrology software they can be saved and exported as CAD solids, surfaces, and wireframe entities. They can also be dimensioned and have applied GD&T (geometric dimensioning and tolerancing) constraints such as datums, parallelism, concentricity, perpendicularity, runout, and other callouts. A fully dimensioned 2D drawing can be printed or exported to PDF for collaboration and other downstream activities.
Understand the conditions in which the data will be taken. Is it indoors, free-state, or in situ on an assembly, stable or moving, or will it be subject to vibration or other environmental conditions for which you need to accommodate? There are solutions for all of these conditions. For example, with parts that might incur movement, there are dynamic reference systems either integral to the metrology or as an external technology. For temperature variations such as outdoor work, CTE (coefficient of thermal expansion) can be accommodated by the metrology software or through manual scaling.
Example Feature-Fitting Workflow
Modeling
Mesh Surfacing
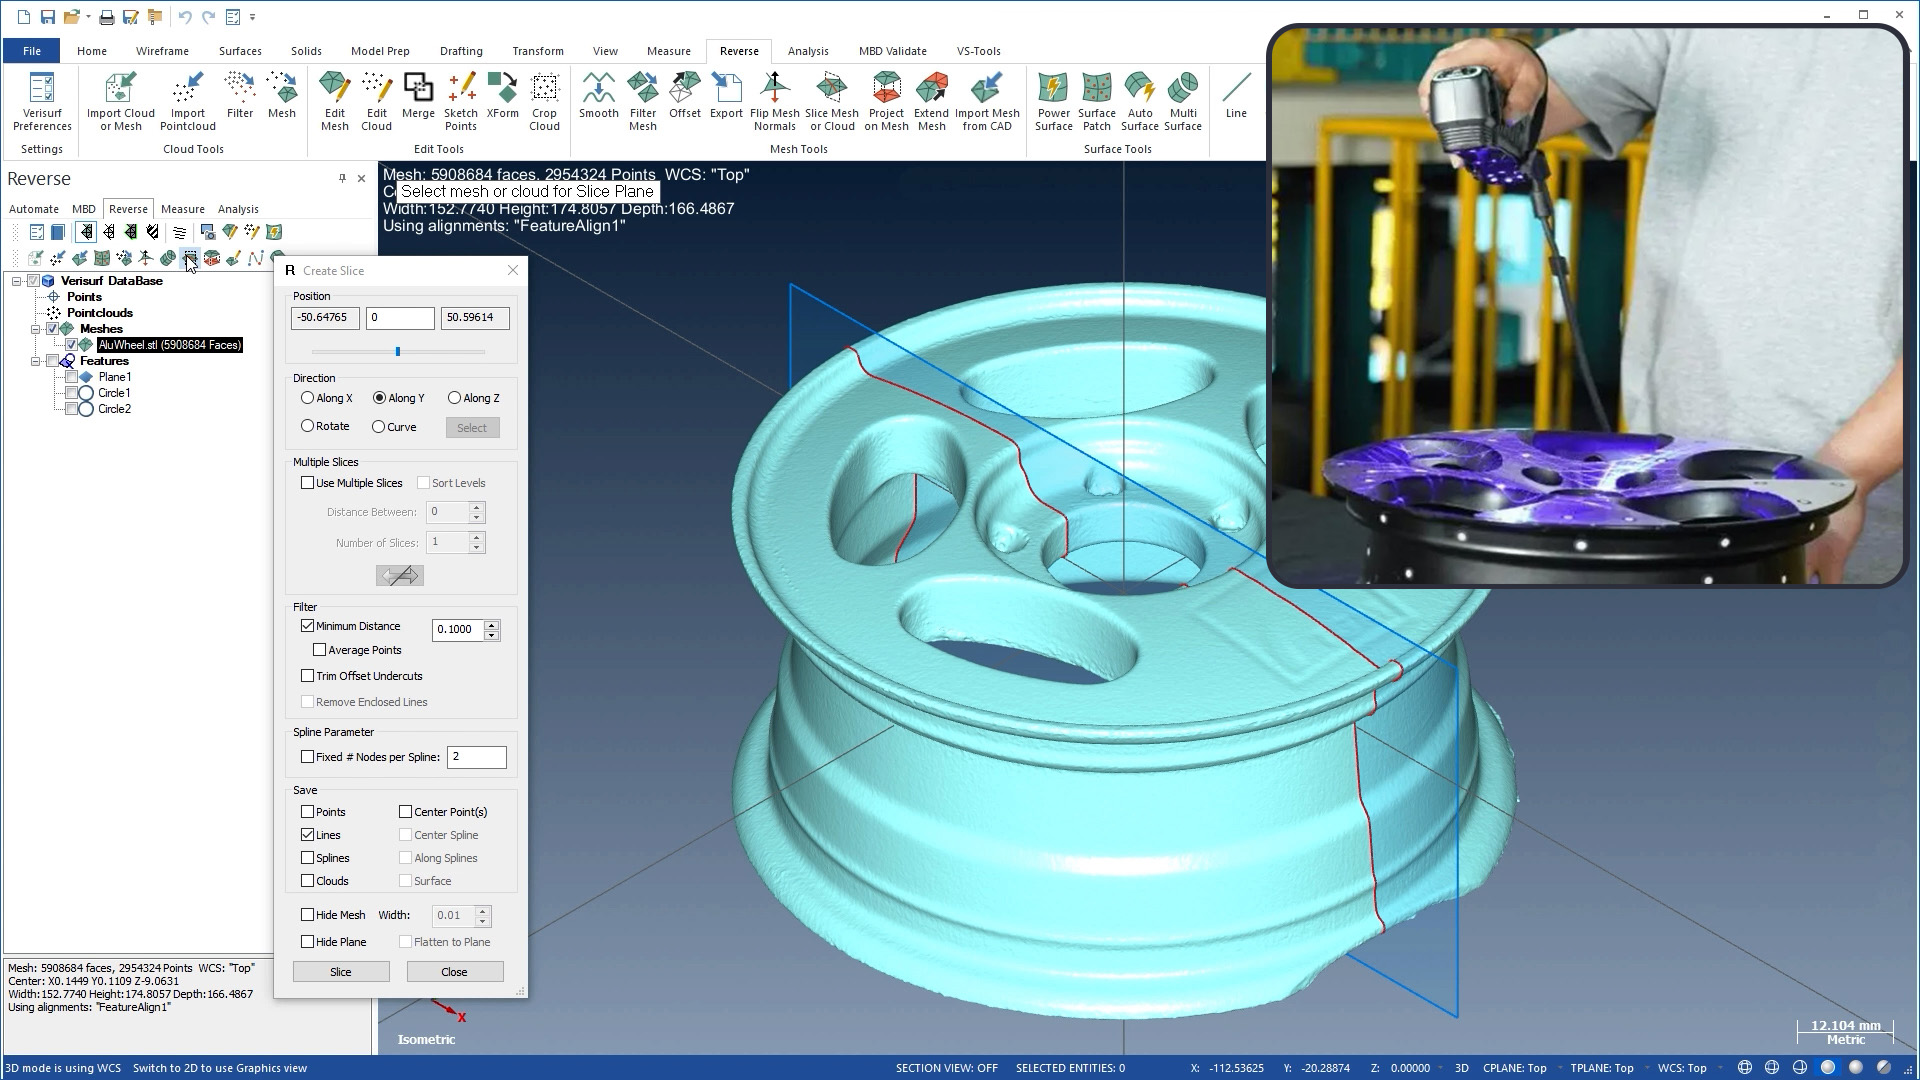
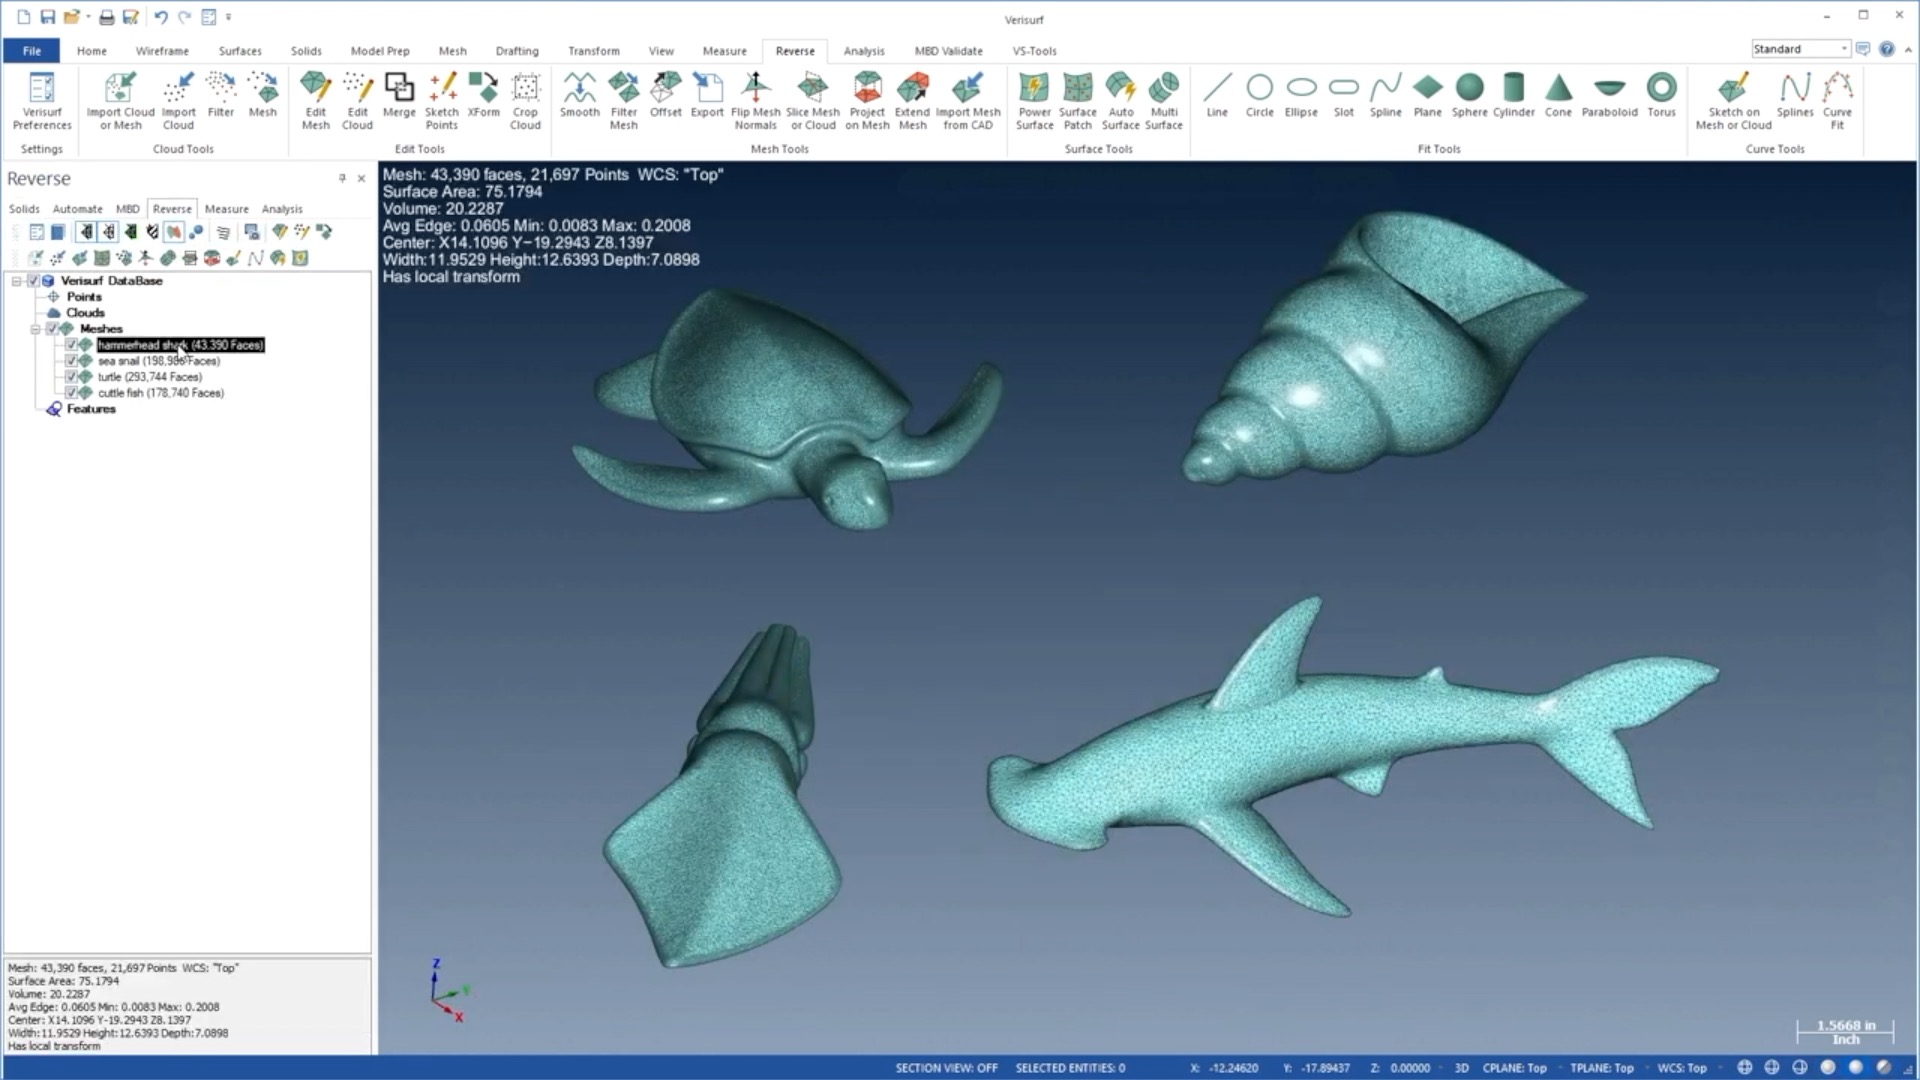
To be successful with scanned data, one needs to be familiar with and work with 3D polygonal meshes. Typically, the raw data is captured as a point cloud and converted into a mesh for cleanup and modeling. The mesh is essential for visualization of the model/part, and it may be used in cleanup and eliminating unwanted scan data. More importantly, the mesh will be used for creating geometrical features, and contoured surfaces that define the part. The mesh can be smoothed, offset, push-pulled and tweaked to refine the model. The mesh is often sliced, sketched upon, holes filled, among other key operations. Some users simply capture the point cloud and then do some of the mesh cleanup, then hand it off to a CAD engineer to finish it with detailed parametric modeling.
Sketching and Curves for Solids and Feature-by-Feature Modeling
Wireframe entities, such as lines, arcs, and splines, may be used to sketch model geometry, often to begin the RE process or at other times along the way. These entities may be measured individually with a contact probe or extracted from a mesh. As wireframe entities are created they can be extended and trimmed to each other forming boundaries that can ultimately be extruded, revolved, lofted, or swept into 3D shapes, surfaces or solids.
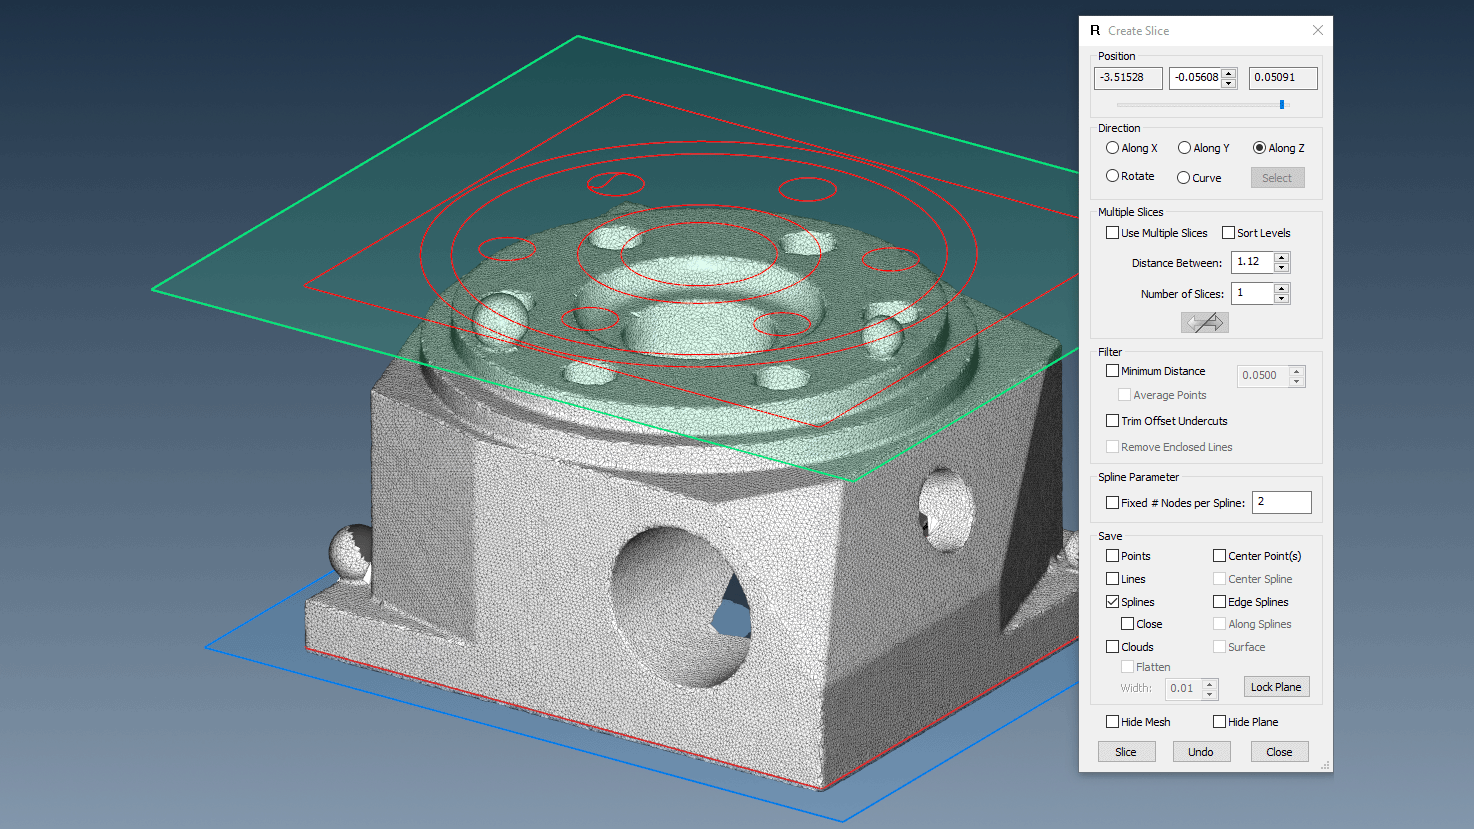
Splines are often created by “slicing” the mesh. Slices can be created where wireframe curves or surface entities cross the mesh at selected CAD planes (XY, YZ, XZ) or constructed planes. Slices may be “lofted” into NURBS (non-rational uniform B-spline) surfaces, and they can be used to trim surfaces to EOP (edge of part).
Scanning – Keys to Getting a Good Scan
For laser line scanners such as those used on portable articulating CMM arms, it is important to understand and hone your skills at maintaining the correct standoff distance from the workpiece. They all have a zone between their maximum and minimum standoff within which to scan good data. Similarly, these scanners have a maximum angle from the surface of the workpiece in order to get good data. In fact, while close to 90 degree angle is optimum, sometimes a near-exact 90 degrees is too perpendicular to get good data, so slightly off 90 degrees is best. Also, surface 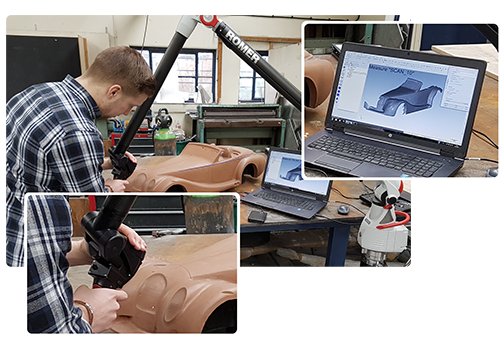 condition and lighting can affect the scan. Shiny surfaces can be particularly challenging, and black surfaces can also present a problem. As scanner technology improves, these factors have become less of a problem. It is common to spray some type of matte finish coating on some parts to make them more acceptable for scanning.
Also, the speed at which you can scan varies from scanner to scanner. Find out what is best for your scanner. Some can scan better but more accurately at lower speeds, and some can be switched between high-speed and high-accuracy modes.
Camera type scanners such as structured light or photogrammetry have their own best practices and operating concerns. For the typical placement of photo-reflective targets it is important to familiarize yourself with the strategies and limits for placement, as well as any issues involving whether adhesive backed stickers are suitable for the surface of the workpiece.
Once you begin scanning, it helps to scan in one direction and minimize overlap as much as possible while ensuring that you get good data over the entire part. As you scan, you look for voids and work to improve your scanning speed, standoff, and angle to minimize voids on your first pass. Multiple passes and overlaps are common, but you may see better results if you can get coverage in one pass with small overlaps.
Dealing with blind spots hidden from the scanner

For non-line-of-sight inner features beyond the reach of non-contact scanners, tactile scanning with a contact probe works well.
Voids will occur in deep features such as holes, slots, troughs, etc. For laser line scanners used on CMM arms, it helps to understand how the scanner works. A laser is emitted from one side of the scanner at an angle to the receiving camera on the other side of the scanner. The angle makes a “V” that can experience being cut off inside of holes or other features. This can be overcome to some degree by rotating the scanner 90 degrees and attempting to scan from there, and holes often require rotating the scanner 360 degrees around an angled approach to the hole to get data inside the hole. Of course, switching to the arm’s contact probe may work better to obtain data within the hole. However, one must understand that probed data needs to be probe-compensated where the scanned data does not. The technician must keep the data separated and/or make sure probe compensation is applied in feature-fitting or other means as they go. Learn more in our comprehensive Performance Racing Engine Head Porting & Reverse Engineering video series.
Sketching or Meshing? How about both?
If the parts being RE’d comprise mostly geometric features like flats, holes, slots, or turned lathe shapes that are cylinders, cones, or of constant radii, then the sketching-extruding approach may be the best choice of techniques. If the shape has more free-flowing, organic contours, like airfoils or car body panels, meshing and mesh modeling will probably work best. Recognizing these concepts, it’s likely that most parts, especially when employing dense scanned data, will require a hybrid approach that combines mesh tools and CAD sketching, surfacing, extruding, etc.
PART 2 – General Workflow
All reverse engineering and scanning projects are different as all of the parts involved are different. There isn’t a fixed workflow that work for all jobs and parts. Therefore, the following steps are simply general guidelines. Several videos are included here as good examples of the process completed professionally and effectively.
Working with the Scanned Dataset
Data Cleanup
If the errant data, “overspray” from the worksurface or fixtures, noise, and other “disconnected” data has already been cleared out with the scanner operating and acquisition software, you will be well ahead of the game as you commence turning it into a finished model. If not, the reverse engineering software will have tools to simplify the cleanup of the scan. It will help you:
- Remove unwanted data from the work surface (if any) with a clipping plane tool
- Delete “noise” or move data that needs to be isolated for any reason using the various tools to manually pick, window-select, scrub-select, or other group-selecting features
- For some parts it may help to separate the data into sections that will simplify your workflow
- Segmenting the data can be simply to make large datasets more manageable, or to isolate geometric features and contour zones to focus on them one at a time
- There may be smoothing that needs to be performed before converting into CAD, and it may be necessary to do this in sections, and it’s important to take care not to over-smooth and losing too much geometry detail
Create an Alignment Establishing a Part-Specific Reference System or Coordinate System
Flat features, corners, cylindrical holes, and other geometric features make good “datums” to be used as the foundation for a good part coordinate system. Creating an alignment as one of the first steps in reverse engineering will make most of the subsequent steps easier and help structure the job logically. See section above “Determine a Strategy for the Part Coordinate/Reference System and Primary Datums” for details on establishing the alignment scheme to be used in this actual scanning workflow.
Now Comes the “Engineering” Part of Reverse Engineering
CAD skills and experience are helpful for being efficient at turning a scan into a parametric solid model, especially for the more involved parts with diverse shapes joined into one. To apply engineering principles and create an accurate model that captures the design intent, it might be best to assign the project to an engineer with CAD expertise. Often QA/CMM operators are the main users of the scanning equipment in an organization. These technicians operate the equipment efficiently; therefore, if the CAD engineer is unavailable to do the project, you might choose to have the QA/metrology technician scan the part and then turn over the data file to your CAD engineer. Keep in mind that having one person engaged for the complete project can have advantages. It often helps to iterate back and forth between the physical part and the evolving CAD. For success, it is good to learn tricks from resources such as videos and, of course, practice. We share links to several RE videos from Verisurf Software engineers here in the article for a good start to your research.
Remember to Create the CAD for Either Design-Intent or As-Built Described Above
Design-intent will require “normalizing” or rounding the dimensions, locations, and referencing as you go. As-built leads you to create an exact duplicate of the manufactured part as it exists, leaving out any notion of what was intended as the geometry as it sits before you.
Use the Mesh as the Foundation for Both NURBS Surfaces and Wireframe Curves
The mesh will be used often to directly create CAD surfaces, much like draping a cloth over an object in real life. Another way to think of it is using a French curve on a drafting board to draw cross sections of a surface, then later combining the sections into a lofted surface. The mesh is also used to project onto or to project from to create wireframe curves. Again, there is a fair amount of skill that goes into doing these things well.
Examples Mesh Curves and Surfaces Workflow
Take Advantage of Best-Fit and Feature-Fit Options of Capable Metrology Software
Often, geometry needs to be “dialed in” or tweaked through an iterative process that evolves to the final, accurate model. Good 3D scanning software provides tools to best-fit data while allowing you to either lock or float all six degrees of freedom to optimize geometry in the 3D CAD environment. Metrology software with reverse engineering-specific capabilities that include feature-fit options to choose from (NIST2-tested math for solving geometry. For example least squares fit, maximum inscribed, minimum circumscribed, minimum zone fit, highest point, lowest point, etc.). The software will also have easy-to-apply feature or surface offset tools that allow you to try different scenarios quickly and easily to help you refine geometry as you work towards the most accurate results.
Check the Accuracy Using CAD-to-Scanned-Data Analysis in the 3D Scanning Software
If CAD is part of the metrology software, you can apply the CAD features and then check them by comparing back to the scan data. Most metrology software will allow you to run a point cloud or mesh to CAD comparison which gives you a color map (unfortunately termed a “heat map” by some) so that you can see how the model compares to the scan data.
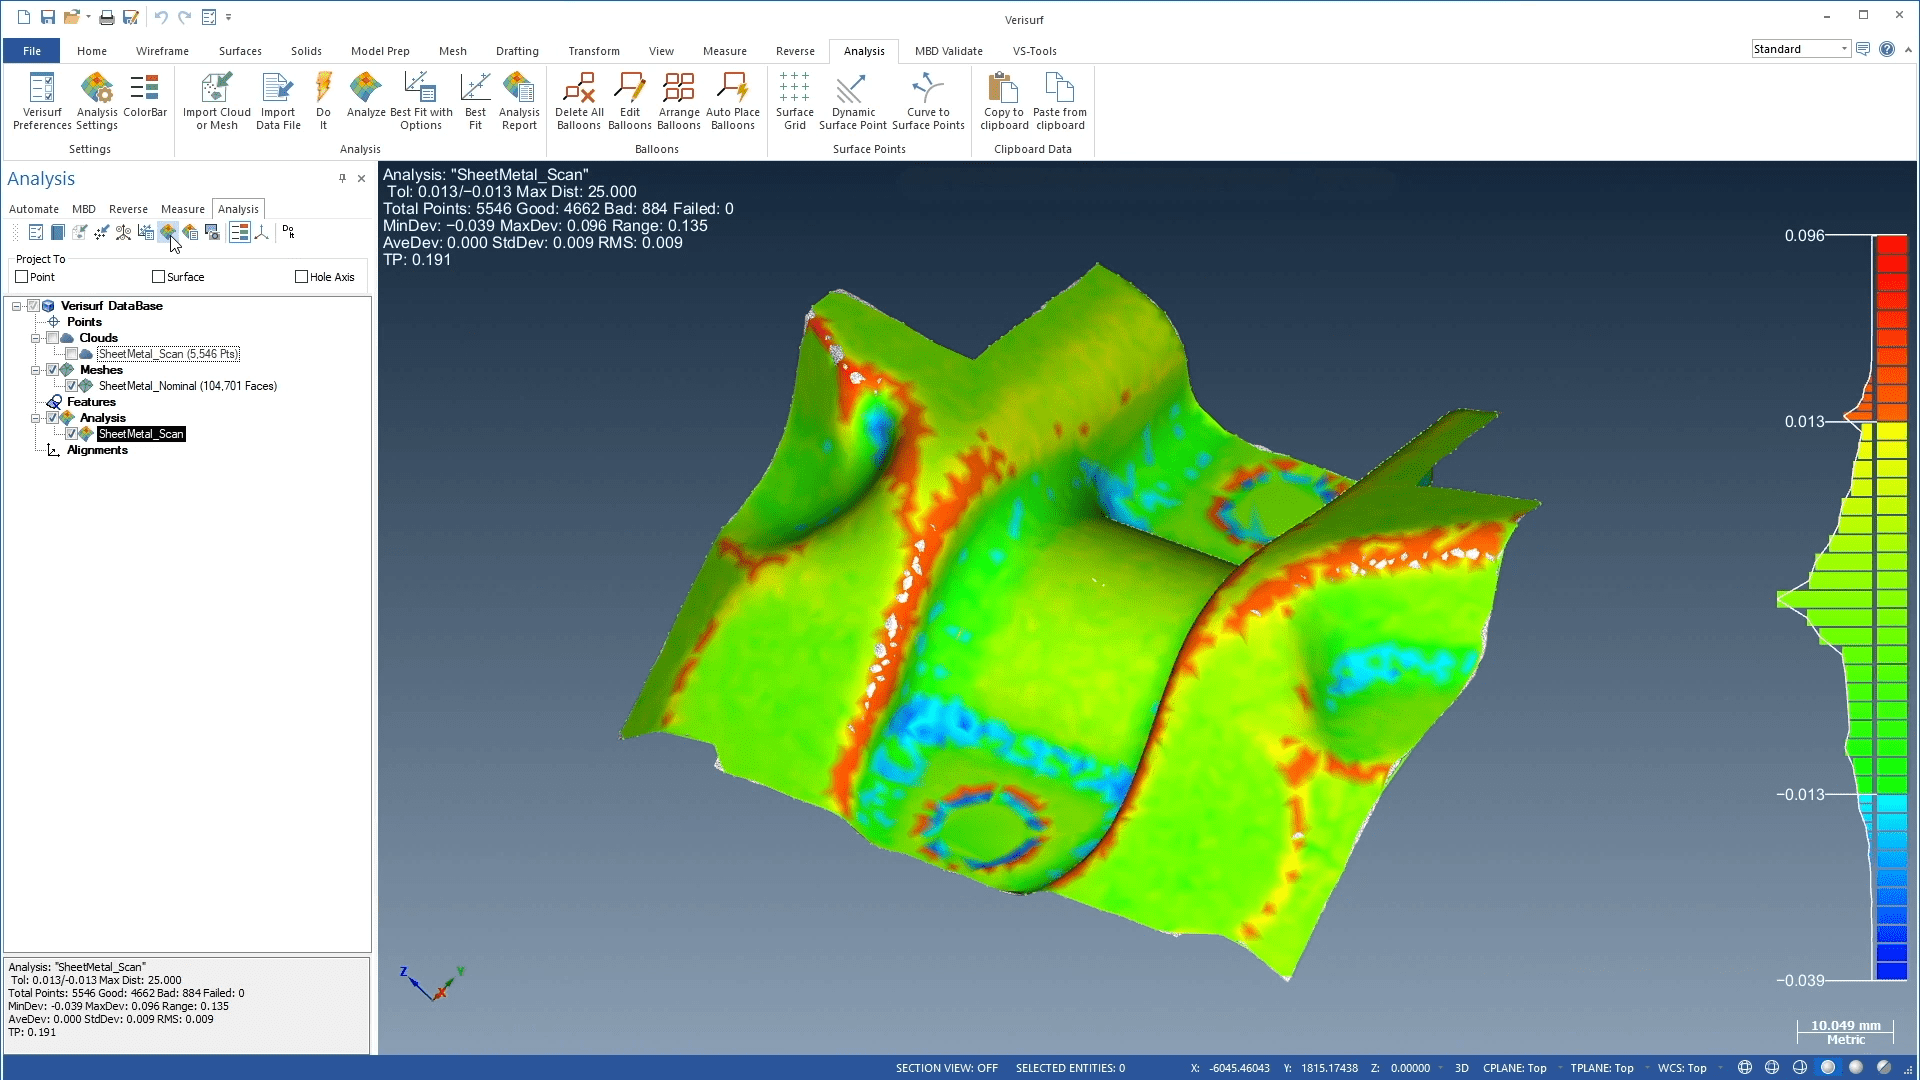
With stamped or hydroformed sheet metal common in automotive and aircraft manufacturing, an analysis color map indicates whether production tooling fully forms the radii.
CAD and Metrology Working Together
An important aspect of 3D scan to CAD is bringing features on the part together and effectively including transitions between features. Fillet radii and chamfers are good examples of such transitions, but they can take many forms. Reverse engineering software will have advanced hybrid tools and techniques plus special surfacing tools that utilize the mesh. Most RE software have greater mesh tools than CAD software. That said, CAD software usually has more ability to mirror, offset, revolve, copy, translate, rotate, etc., which are tremendously useful, time-saving tools in the process. All of this makes a good argument for software that combines powerful CAD and measurement metrology, reverse engineering software all in one.
Notes and references:
1 The Seven Habits of Highly Effective People, Author: Dr. Steven Covey
2 NIST = The USA’s National Institute of Standards and Technology
Author: Scott Knoche – Verisurf Software, Inc. (technical marketing & sales at Verisurf since 2002)
Video Library
3D Scanning Complete Workflow Videos
More 3D Scanning Videos
