
Tech Tip – Connecting the Laser Scanner
to the Absolute Master3DGage
The following are the instructions for connecting the Laser Scanner to the Master3DGage Arm.
- Open the Laser Scanner box and remove the Laser Scanner.
- Remove any attached Probe from the Absolute Master3DGage Arm.
- Mount the Scanner to the on the connector and lock the knob securely (shown right).
- Remove the LAN Cable from the Laser Scanner Box, if there are two cables included, you will use the cable with the single connection as shown below.
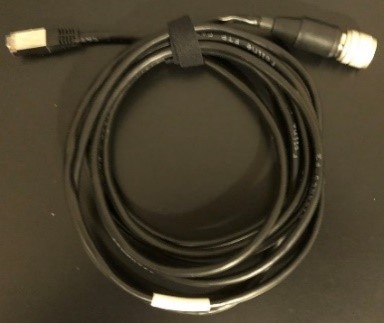
Above – Scanner LAN cable
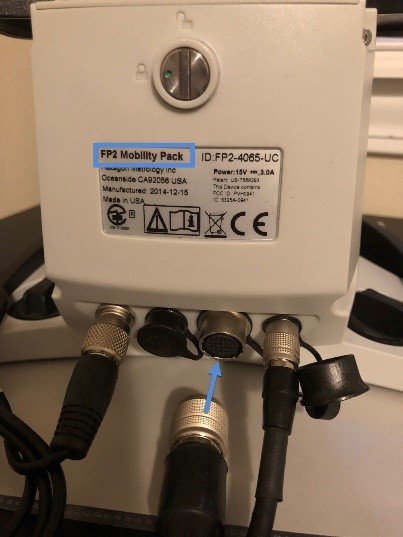
- Connect the LAN Cable Connection to the Computer and the other end to the back of the Absolute Master3DGage (shown right).
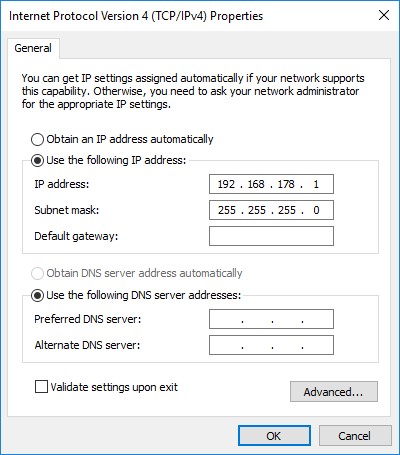
- Setup the LAN Connection (IP4) on the computer (image lower right); check the back of the Arm for the Feature Pack Number (FP) shown on right:
Use the LAN Number for the FP:

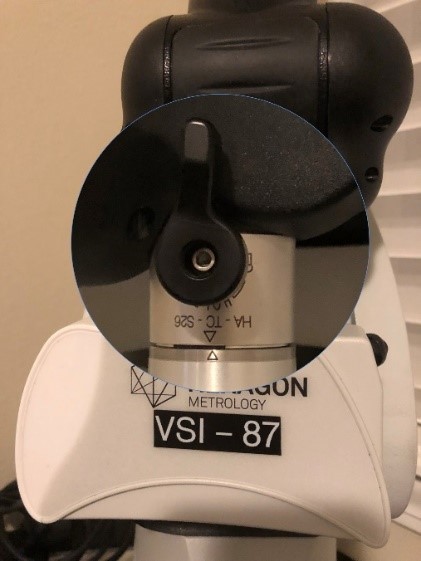
Above – Scanner attached and locked, note the Alignment symbols ( ) on the Scanner and Connector.
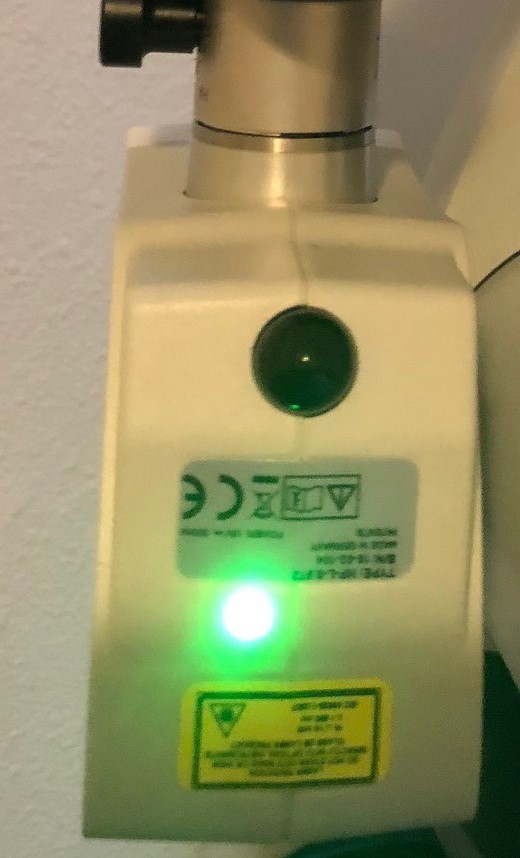
- Turn the Arm ‘ON’.
- The Scanner has a Green Indicator Light that should now show power. If the green light is flashing the Scanner is in warm up mode.
- If the Scanner requires calibration watch our YouTube video: https://youtu.be/ycprqybMwJY
Verisurf Software, Inc.
Verisurf Software, Inc. is an advanced three-dimensional measurement solutions company committed to delivering advanced computer-aided inspection and reverse engineering solutions. Verisurf software helps manufacturers of all sizes and industries produce higher quality products in less time and at a lower cost with automated, Model-Based Inspection processes. For more information, visit the Verisurf website at https://verisurf.com.