Composites Manufacturer
Produces More Parts With Verisurf
“The traditional method works, but it’s slow and not very accurate. Using Verisurf software with a Faro arm offers accuracy comparable to fixed CMMs. Verisurf is fully programmable and supports repetitive measurement so it greatly increases both the speed and accuracy of the inspection process. The result is that we are able to get more parts out the door with the same people while maintaining higher standards of quality.”
Unitech Composites and Structures, a division of the AGC Aerospace & Defense Composites and Structures Group, designs and manufactures composite structures in commercial and military aerospace markets. Most of these parts have critical dimensional and structural requirements so an exacting 100% inspection process is required. In the past, the company used traditional inspection methods which involved using hand tools for measurements and manual calculations to determine deviation from true-position.
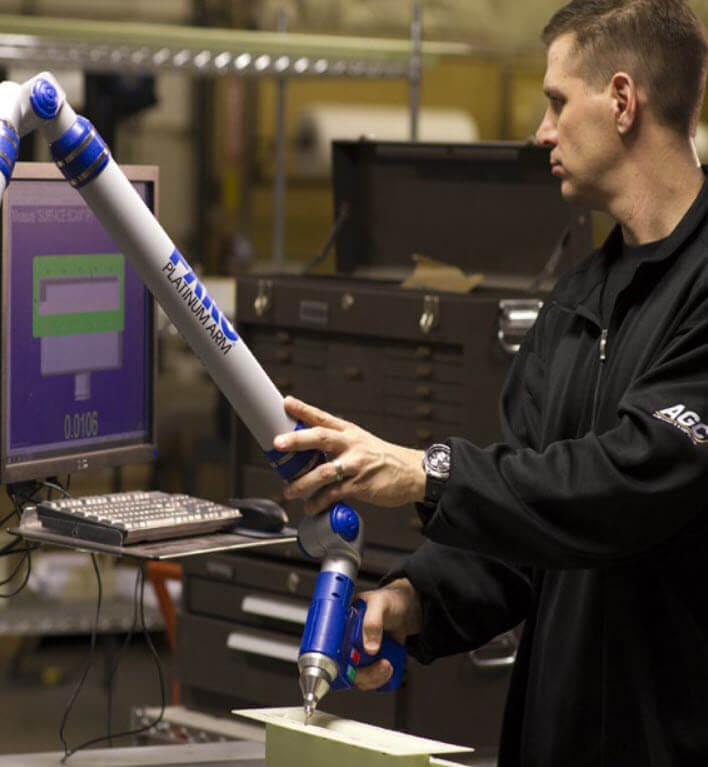
Now, the company uses a FaroArm®, a portable coordinate measuring machine (CMM), to capture points while Verisurf software uses best-fit algorithms to instantaneously compute true position deviation. “We are in a business where everything we make needs to be carefully measured to ensure it meets our customers’ critical specifications,” said Alan L. Haase, President & CEO, AGC Aerospace & Defense Composites and Structures Group. “By using the FaroArm we are getting significantly more parts out the door with the same staffing.”
Traditional Methods Too Slow
“The parts and assemblies we produce are installed in high-performance aircraft and there is little room for error,” Haase said. “Making sure these parts and assemblies meet and exceed customer specifications can quite literally be the difference in a successful flight or mission for our armed forces.” One of the most critical challenges is measuring geometry design and tolerancing (GD&T) features including the deviation from true-position of features. The manual methods used in the past were time-consuming and subject to potential errors. Calipers, height gauges, micrometers, and other hand tools were used with an inspection plate to make measurements and compare the feature’s position to three datums. The first step, in the case of a hole, for example, was to measure its diameter. Next measurements were taken of the hole’s closest and further positions to the x- and y-axes in order to determine its Cartesian coordinates. The deviation D of the true position from the position called out in the drawing was then calculated using the equation D = 2√(∆x)2+(∆y)2 where ∆ equals the measured deviation in each axis. This cumbersome procedure took about 20 minutes even for very simple measurements.
Another problem with the traditional approach is that it requires someone with both math and blueprint interpretation skills that are often difficult to find in today’s workforce. “I am old-school so I still know how to manually calculate true position based on manual measurements,” said Tom Van Der Griend, Director of Quality for United Composites. “But workers with these skills are becoming harder and harder to find.”
Many of Unitech Composite’s customers have moved to a model-based design (MBD) or digital product definition (DPD) approach in which the dimensions, GD&T, annotations, and parts lists are inserted directly into the solid model, eliminating the need for drawings. The live 3D model with a prescribed series of annotated and dimensioned views is provided to United Composites instead of blueprints. In order to support MBD using traditional methods, it was necessary to get multiple layers of the organization involved to read the model, convert the model to 2D drawings and then inspect to the 2D conversion.
FARO Arm and Verisurf Software Speeds Process
“It became obvious that we needed to find an inspection method based on MBD and DPD,” Van Der Griend said. “We looked at laser scanners and CMMs. Laser scanners are powerful tools but they require a considerable amount of manual effort to perform a true position inspection. On the other hand, the Faro Arm and Verisurf software provide a truly seamless solution that can be programmed to dramatically reduce the time involved in inspection while also reducing the potential for error.”
In the case mentioned above of determining the true position of a hole, the operator clamps the part in place using simple tools because the part does not need to be accurately positioned. The operator captures data points by using the device’s probe. The Faro Arm determines and records the location of the probe in 2D space and reports the results through software. The rotational angle of each joint and the length of each segment in the arm is determined using optical encoders that count rotations incrementally via detection of accurately spaced lines on a glass grating disc. Software converts the counts into angle changes and determines the position of the probe. The device’s laptop computer simultaneously illustrates the 3D measurements on-screen and records all of the data.
The operator begins by taking several points along the datums to accurately establish the position of the part. The process is repeated for the hole. The software then dimensions the position of the hole. When all of the points are taken, the user pulls away from the part. The entire process takes less than five minutes.
In a more complex example such as the parts produced by Unitech, the customer’s model which includes all of the MBD tolerances is pulled into Verisurf. The operator touches three points to align the A datum, two points to align the B datum and one point to align the C datum. Verisurf then aligns the part to the model and highlights the points to be measured one after another. As each point is highlighted the operator touches those points. If data points are within tolerance, they are colored green on the screen. If they are within tolerance but approaching the limits, they are colored yellow and points that are out of tolerance are colored red.
This approach eliminates the need for manual gauges or calculations, dramatically reduces the time required to inspect complex parts and nearly eliminates the possibility of error. The results are provided in real time while the measurements are being taken. So if there is a problem with a part or fixture, the operator does not waste any time completing the inspection but rather can abort the inspection as soon as they understand the problem and begin making corrections.
Time Savings and Improved Accuracy
“Our average part previously required four hours for inspection and this time has been reduced to 30 minutes by using Faro,” Van Der Griend said. “The ability to perform the inspection directly from the model without any preparation has also eliminated the need for multiple layers of the organization to become involved. The model can now be brought into the Faro Arm by QA, inspected by QA and reported by QA, thereby reducing lead time by an additional four to six hours depending on the part configuration.
We are saving $200,000 per year by streamlining the inspection process. We are also generating additional revenues by bidding on and often winning jobs that require MBD or DPD inspection and validation. Even more important than the time savings are the improvements in accuracy and assured quality that we have achieved, We have improved customer satisfaction through our ability to inspect directly from the model and improve the repeatability of the inspection process.
Many of our customers have evaluated our new inspection process and we have received approvals from every single customer. The Faro Arm provides much higher levels of accuracy than can be achieved with manual measurements. The latest-generation provides volumetric accuracy of ±0.034 mm ( ±0.0013 inch) and single point repeatability of 0.024 mm (0.0009 inches). Students today rely on computers and understand 3D models much better than blueprints,” Van Der Griend said. “So it’s much easier to teach people to operate a portable CMM and operators perform at a higher level with accuracy and consistency using this tool.”
The Faro Arm also offers a major advantage over a traditional CMM in that it can be moved around very large parts to measure them and can also travel around the plant to measure tooling that is too heavy to be moved. Available in either six- or seven-axis models, the Faro Arm also requires a smaller footprint on the shop floor. “100% inspection is required for nearly all of the parts we make,” Haase concluded. “The traditional method works, but it’s slow and not very accurate. The Faro Arm offers accuracy comparable to fixed CMMs and software that is fully programmable for repetitive measurement so it greatly increases both the speed and accuracy of the inspection process. The result is that we are able to get more parts out the door with the same people while maintaining higher standards of quality.”
##
About Unitech Composites
Based in Hayden, Idaho, Unitech Composites has over thirty years of experience supporting the aerospace industry. Unitech maintains a commitment to innovation, quality, and flexibility towards the requirements of individual airlines and OEMs. The company fabricates complex components for fixed and rotary wing aircraft. In-house capabilities include the design, manufacture, and assembly of components as small as brackets and internal ducting to primary support structures as large as wings and other complex assemblies containing hundreds of individual components. The AGC Composites and Structures Group, operating within the AGC Aerospace & Defense portfolio, is composed of Unitech Aerospace, Integrated Composites, and Hill AeroSystems. The group leverages the aggregate strength of its design, engineering, development and manufacturing capabilities derived from multiple platforms to offer cost savings and efficiencies to its customers.
About Verisurf Software, Inc.
Verisurf Software, Inc. is an advanced three-dimensional measurement solutions company committed to delivering advanced computer-aided inspection and reverse engineering solutions. Verisurf software helps manufacturers of all sizes and industries produce higher quality products in less time and at a lower cost with automated, Model-Based Inspection processes. For more information, visit the Verisurf website at https://verisurf.com.


